![[New] Utilizing Instagram Filters to Elevate Your Photos for 2024](https://thmb.techidaily.com/fa14c75d8130ba0e60c04982be06f0a527e7ccaf343b8c78b71c24740e6fd540.jpg)
[New] Utilizing Instagram Filters to Elevate Your Photos for 2024
Utilizing Instagram Filters to Elevate Your Photos
How to Use Filters on Instagram?

Shanoon Cox
Mar 27, 2024• Proven solutions
With the new Instagram update, many individuals have noticed that the layout has become a bit complex. Similarly, the feature to apply filters has also become complicated, making the users wonder how to use filters on Insta? If you are experiencing the same issue, then don’t worry! You have strolled upon the right article. In this article, you’ll discover how to use Instagram filters on feed posts, stories, and reels. So, make sure to skim through the whole article to apply filters on Instagram successfully.
- Part 1: What is an Instagram Filter?
- Part 2: How to Add Filters on Instagram Story?
- Part 3: How to Apply Filters to Instagram Posts?
- Part 4: How to Add Filters on Instagram Reels?
- Part 5: How to Organize the Instagram Filters?
Part 1: What is an Instagram Filter?
The Instagram filter is a valuable tool that enables you to alter your picture with a single click by making relevant adjustments to the photo on Instagram. The feature for the Instagram filter was released in 2011 with a few basic choices for filtering your image. It provides the user with multiple ways to edit a picture with more excellent quality, an extra border, and even some significant tilt-shift effects. Because of the easy and friendly layout of Instagram, it is much easier for the user to apply filters. And, it is better to keep your application updated as Instagram is constantly releasing new layouts for the convenience of its users.
This feature, although user-friendly, might be confusing for some. That is why we will show you how to enhance your posts and stories in a few simple steps.
Part 2: How to Add Filters to a Photo and Video on Instagram Story?
With the easy layout provided by Instagram, it is incredibly easy to edit your pictures. Specifically, talking about adding filters to a photo or video on the Instagram story is probably the easiest thing to do on Instagram, and it does not even take much time. Adding filters to your photo or video can take a maximum of five minutes to do so.
Following are the steps to add filters to a photo and video on Instagram Story, so you no longer have to worry about how to use filters on Insta. Make sure you follow every step so you can successfully get the job done.
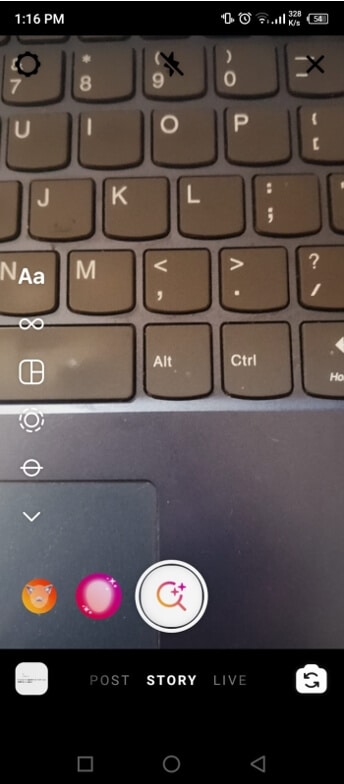
Step 1: Select or Capture a Photo/Video
The initial step is to open your camera on Instagram and swipe up to select an existing picture/video or capture a photo/video to apply a filter.
Note: Another way to add an existing picture is to tap on the bottom left corner, where you can see the photo gallery icon. Next, tap on the image you want to apply the filter on.
Step 2: Tap on a Filter
Now that you have selected a photo, an editing screen will be displayed on your device. Tap on a specific filter of your choice by swiping through the effects displayed on the editing screen to add effects to your existing picture/video.
Note: If you do not like the effects displayed on the screen, browse other filters by tapping on the search option.
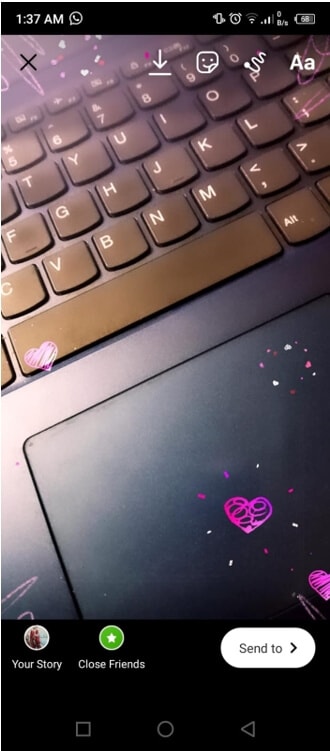
Step 3: Add the Picture/Video to Story
Tap on Done once you have chosen a filter. And then, add the picture/video to your Instagram story by clicking on the icon labeled Your Story.
Part 3: How to Apply Filters to Instagram Posts and Carousel Posts?b
Applying filters to your Instagram posts is just as easy as adding filters to an Instagram story. Adding filters to your posts can make your profile look more attractive and thus improve engagement. Though the method is different for both cases, they have the same effect. Applying filters to your posts can enhance their quality and result in more likes and comments.
Follow the steps given below to add filters to your Instagram post or carousel post effortlessly.
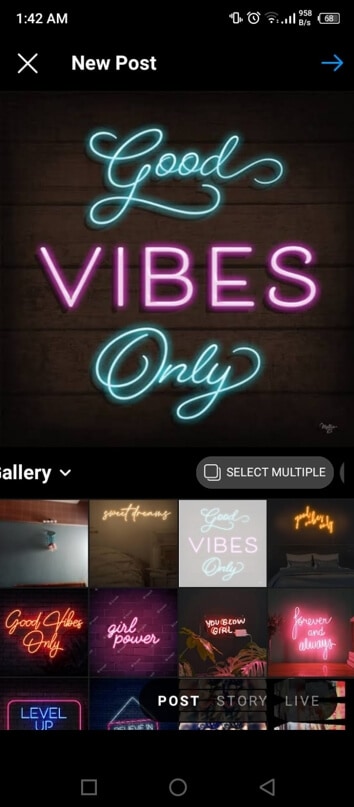
Step 1: Tap on the Plus Icon
The initial step is to tap on the Plus icon at the bottom of the screen. Then select an existing picture or capture a photo for further editing.
Note: For a carousel post, long press on a picture and select other pictures you want to add to your Instagram post.
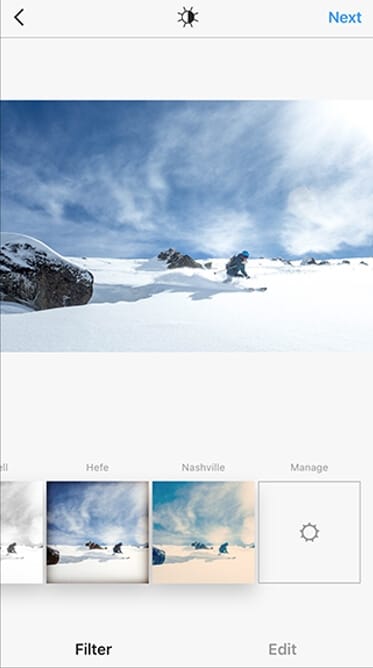
Step 2: Tap on Next Post
Next, tap on the Next icon present at the top right corner to apply filters to your photo. Then tap on the specific picture you want to apply a filter on and tap on a filter to add it. You can even further edit by tapping on the option to Edit at the bottom right corner.
Note: If you tap on the filter for the second time, an option to control the filter’s intensity will be shown. Adjust it accordingly to your preference.
Step 3: Share your Post
Once you are done with all the relevant editing needed, tap on the Done. A screen will be displayed to add a caption and location. Once you have completed editing your photo, tap on the Share option at the top right corner.
Part 4: How to Add Filters on Instagram Reels?
Instagram Reels are very similar to TikTok videos, with the iconic feature of uploading entertaining short fifteen-second videos as Instagram Reels. Instagram reels are one of the most prominent features of the new updated version of the Instagram Application.
This method is quite similar to that of applying filters to Instagram stories. For your ease, we have listed a step-by-step guide below to add filters on Instagram reels.
Step 1: Go to Create Mode
Tap on the camera icon on the top left corner of the screen. And then, tap on the Reels option to go to Instagram reels create mode.
Note: Another way to create an Instagram Reel is to go to the reels explore page and tap on the camera icon present at the top right corner of the screen.
Step 2: Tap on the Smiley Face Icon
Next, tap on the Smiley Face Icon to add filters. Choose from the variety of available filters. Then tap on the chosen filter to apply it to your Instagram reel.
Step 3: Start Recording
Once you are done selecting the desired filter for your Instagram reel, start recording. After the recording is done, you will notice the filter added to the whole Instagram reel you just shot.
Part 5: How to Organize the Instagram Filters for Post/Reels/Feed?
Instagram is a great application that offers a wide range of filters to its users. Even though it’s a great feature and very beneficial for the users to choose among the variety, it can be annoying to skim through the long list to find a specific filter. For that sole reason, Instagram provides the user with the option to hide certain filters or rearrange them to find a filter of your preference easily.
The steps below are a guide to organizing the filters for your Instagram Post/Reels/Feed.
Step 1: Tap on Manage Option
The initial step is to select or capture a photo/video. Go to the filters screen and scroll to the end of the list to tap on the Manage option. It is a settings option specifically for the filters feature.
Step 2: Rearrange or Hide Filters
For rearranging your filters, hold and drag the three lines on the left side of the specified filter to wherever you want it to be. As for hiding a specific filter, tap on the circle present at the right side of the filter. When the tick sign disappears and the color of the title of the filter fades, it means that the filter has been hidden.
Note: Another way to rearrange or hide filters is to do it from the filters screen. Long press on the specified filter and drag it to the position you want it to be. And drop the filter on the Drag to hide option to hide the selected filter. You can always turn off this feature from the manage menu.
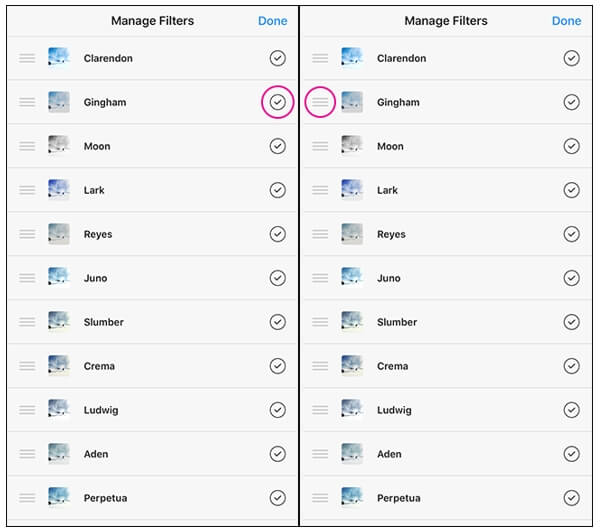
Step 3: Tap Done
Once you have made the required adjustments, tap on the Done option present at the top right corner of the screen. And you are done rearranging the filters!
Conclusion
For many individuals, using Instagram might not be as easy as it is for the new generation. It could be because some individuals find the layout to be a bit complicated, which might be the reason why they are not able to apply filters.
But don’t panic! In this article, we have talked about the nitty-gritty on how to use filters on Insta. And that’s about it on how to use filters on Instagram.
Even though keeping the application updated is crucial, it is also essential to follow each step thoroughly to add filters to your Instagram Post/Feed/Story effortlessly. You won’t face any issue if you follow the steps exactly as mentioned.
Shanoon Cox
Shanoon Cox is a writer and a lover of all things video.
Follow @Shanoon Cox
Shanoon Cox
Mar 27, 2024• Proven solutions
With the new Instagram update, many individuals have noticed that the layout has become a bit complex. Similarly, the feature to apply filters has also become complicated, making the users wonder how to use filters on Insta? If you are experiencing the same issue, then don’t worry! You have strolled upon the right article. In this article, you’ll discover how to use Instagram filters on feed posts, stories, and reels. So, make sure to skim through the whole article to apply filters on Instagram successfully.
- Part 1: What is an Instagram Filter?
- Part 2: How to Add Filters on Instagram Story?
- Part 3: How to Apply Filters to Instagram Posts?
- Part 4: How to Add Filters on Instagram Reels?
- Part 5: How to Organize the Instagram Filters?
Part 1: What is an Instagram Filter?
The Instagram filter is a valuable tool that enables you to alter your picture with a single click by making relevant adjustments to the photo on Instagram. The feature for the Instagram filter was released in 2011 with a few basic choices for filtering your image. It provides the user with multiple ways to edit a picture with more excellent quality, an extra border, and even some significant tilt-shift effects. Because of the easy and friendly layout of Instagram, it is much easier for the user to apply filters. And, it is better to keep your application updated as Instagram is constantly releasing new layouts for the convenience of its users.
This feature, although user-friendly, might be confusing for some. That is why we will show you how to enhance your posts and stories in a few simple steps.
Part 2: How to Add Filters to a Photo and Video on Instagram Story?
With the easy layout provided by Instagram, it is incredibly easy to edit your pictures. Specifically, talking about adding filters to a photo or video on the Instagram story is probably the easiest thing to do on Instagram, and it does not even take much time. Adding filters to your photo or video can take a maximum of five minutes to do so.
Following are the steps to add filters to a photo and video on Instagram Story, so you no longer have to worry about how to use filters on Insta. Make sure you follow every step so you can successfully get the job done.
Step 1: Select or Capture a Photo/Video
The initial step is to open your camera on Instagram and swipe up to select an existing picture/video or capture a photo/video to apply a filter.
Note: Another way to add an existing picture is to tap on the bottom left corner, where you can see the photo gallery icon. Next, tap on the image you want to apply the filter on.
Step 2: Tap on a Filter
Now that you have selected a photo, an editing screen will be displayed on your device. Tap on a specific filter of your choice by swiping through the effects displayed on the editing screen to add effects to your existing picture/video.
Note: If you do not like the effects displayed on the screen, browse other filters by tapping on the search option.
Step 3: Add the Picture/Video to Story
Tap on Done once you have chosen a filter. And then, add the picture/video to your Instagram story by clicking on the icon labeled Your Story.
Part 3: How to Apply Filters to Instagram Posts and Carousel Posts?b
Applying filters to your Instagram posts is just as easy as adding filters to an Instagram story. Adding filters to your posts can make your profile look more attractive and thus improve engagement. Though the method is different for both cases, they have the same effect. Applying filters to your posts can enhance their quality and result in more likes and comments.
Follow the steps given below to add filters to your Instagram post or carousel post effortlessly.
Step 1: Tap on the Plus Icon
The initial step is to tap on the Plus icon at the bottom of the screen. Then select an existing picture or capture a photo for further editing.
Note: For a carousel post, long press on a picture and select other pictures you want to add to your Instagram post.
Step 2: Tap on Next Post
Next, tap on the Next icon present at the top right corner to apply filters to your photo. Then tap on the specific picture you want to apply a filter on and tap on a filter to add it. You can even further edit by tapping on the option to Edit at the bottom right corner.
Note: If you tap on the filter for the second time, an option to control the filter’s intensity will be shown. Adjust it accordingly to your preference.
Step 3: Share your Post
Once you are done with all the relevant editing needed, tap on the Done. A screen will be displayed to add a caption and location. Once you have completed editing your photo, tap on the Share option at the top right corner.
Part 4: How to Add Filters on Instagram Reels?
Instagram Reels are very similar to TikTok videos, with the iconic feature of uploading entertaining short fifteen-second videos as Instagram Reels. Instagram reels are one of the most prominent features of the new updated version of the Instagram Application.
This method is quite similar to that of applying filters to Instagram stories. For your ease, we have listed a step-by-step guide below to add filters on Instagram reels.
Step 1: Go to Create Mode
Tap on the camera icon on the top left corner of the screen. And then, tap on the Reels option to go to Instagram reels create mode.
Note: Another way to create an Instagram Reel is to go to the reels explore page and tap on the camera icon present at the top right corner of the screen.
Step 2: Tap on the Smiley Face Icon
Next, tap on the Smiley Face Icon to add filters. Choose from the variety of available filters. Then tap on the chosen filter to apply it to your Instagram reel.
Step 3: Start Recording
Once you are done selecting the desired filter for your Instagram reel, start recording. After the recording is done, you will notice the filter added to the whole Instagram reel you just shot.
Part 5: How to Organize the Instagram Filters for Post/Reels/Feed?
Instagram is a great application that offers a wide range of filters to its users. Even though it’s a great feature and very beneficial for the users to choose among the variety, it can be annoying to skim through the long list to find a specific filter. For that sole reason, Instagram provides the user with the option to hide certain filters or rearrange them to find a filter of your preference easily.
The steps below are a guide to organizing the filters for your Instagram Post/Reels/Feed.
Step 1: Tap on Manage Option
The initial step is to select or capture a photo/video. Go to the filters screen and scroll to the end of the list to tap on the Manage option. It is a settings option specifically for the filters feature.
Step 2: Rearrange or Hide Filters
For rearranging your filters, hold and drag the three lines on the left side of the specified filter to wherever you want it to be. As for hiding a specific filter, tap on the circle present at the right side of the filter. When the tick sign disappears and the color of the title of the filter fades, it means that the filter has been hidden.
Note: Another way to rearrange or hide filters is to do it from the filters screen. Long press on the specified filter and drag it to the position you want it to be. And drop the filter on the Drag to hide option to hide the selected filter. You can always turn off this feature from the manage menu.
Step 3: Tap Done
Once you have made the required adjustments, tap on the Done option present at the top right corner of the screen. And you are done rearranging the filters!
Conclusion
For many individuals, using Instagram might not be as easy as it is for the new generation. It could be because some individuals find the layout to be a bit complicated, which might be the reason why they are not able to apply filters.
But don’t panic! In this article, we have talked about the nitty-gritty on how to use filters on Insta. And that’s about it on how to use filters on Instagram.
Even though keeping the application updated is crucial, it is also essential to follow each step thoroughly to add filters to your Instagram Post/Feed/Story effortlessly. You won’t face any issue if you follow the steps exactly as mentioned.
Shanoon Cox
Shanoon Cox is a writer and a lover of all things video.
Follow @Shanoon Cox
Also read:
- [Updated] In 2024, Detailed Explanation for Transforming Gender Display in Instagram, Facebook & Snapchat Pictures
- [Updated] Maximizing Reach and Engagement in IGTV Content Strategy for 2024
- Digital Era's Dollars: Gaming Past & PC Building Now
- Enhance VFX Artistry in Your Videos with Integrated, Free LUT Support From OBS
- Fixing Auditory Hiccups: Resolve Your YouTube Player Sounds Problem Under Windows 11
- Fixing One-Sided Windows Headphone Sound Loss
- In 2024, Mastering the Transition Moving Your Snapchat Savings Home
- In 2024, Stop Automated Post Proposals on Instagram
- Influential Impact Celebrating Instagram's Most Dynamic Stars for 2024
- Learn to Flip Videos A Guide for Instagram Users for 2024
- Ultimate Guide to Prevent Dead By Daylight From Crashing
- Understanding the Scope of Upgrades Vs. Routine Patching
- Win 10'S Guide to Effortlessly Merge Data
- Title: [New] Utilizing Instagram Filters to Elevate Your Photos for 2024
- Author: Robert
- Created at : 2024-11-27 18:58:55
- Updated at : 2024-11-28 19:04:38
- Link: https://instagram-video-files.techidaily.com/new-utilizing-instagram-filters-to-elevate-your-photos-for-2024/
- License: This work is licensed under CC BY-NC-SA 4.0.